Connecting an Envoy to the Internet
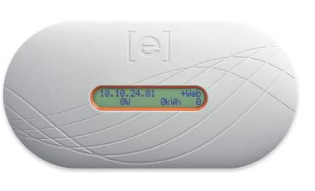
Envoy R
Wi-Fi Adapter

Envoy S – Standard
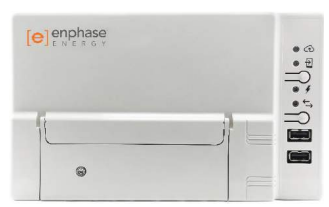
Envoy S – Metered

Contents
-
Wired Connection
Envoy R
Envoy S
-
Wireless Connection
WPS Method (All Envoy Models)
Method A for Envoy R – Manual Configuration for Internet Connection
Method B for Envoy R – Manual Configuration for Internet Connection
Method C for Envoy S – Manual Configuration for Internet Connection
Method D for Envoy S – Manual Configuration for Internet Connection
Wired Connection
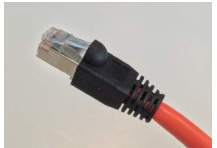
IMPORTANT – When connecting your Ethernet cable into the modem, ensure you plug the cable into a LAN port (not the WAN port).
Envoy R
Using an ethernet cable, connect the Envoy R to your router/modem and wait up to 5 minutes. If successful the IP address will change to an address that begins with either 192, 172 or 10, and you should also see “+Web” in the top right corner.
Envoy S
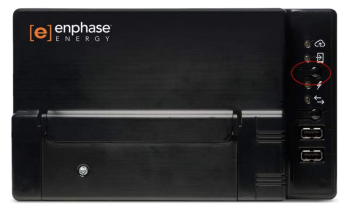
Using an ethernet cable, connect the Envoy S to your router/modem and wait up to 5 minutes. The very top LED (next to the cloud icon) will begin flashing green initially to indicate that the Envoy S is attempting to establish a connection to the Internet. If successful, the top LED will become solid green.
Wireless Connection
WPS Method (All Envoy Models)
The WPS method is the easiest and quickest method to connect an Envoy to the Internet. Therefore, it is recommended to attempt this first as it will only take a few minutes.
Envoy R
Note – The Wi-Fi adapter needs to be plugged into the Envoy R in order for this to work
1) Hold down the MENU button until “Enable Wi-Fi WPS” appears on the screen. Release the MENU button to select it.
2) Push the WPS button on your router.
3) Wait up to 5 mins.
4) If the Envoy screen shows +Web then the internet connection was successful.
Envoy S
1) Hold the top button for 5 seconds (the button beneath the phone icon and above the lightning bolt
icon).
2) The top LED (next to the cloud icon) will begin to flash green to indicate WPS mode is activated.
3) Push the WPS button on your router.
4) Wait up to 5 mins.
5) If the top LED becomes solid green, internet connection is successful.

Method A for Envoy R – Manual Configuration for Internet Connection
NOTE – The Wi-Fi adapter must be plugged into the Envoy, otherwise step 1 will not work
1) Holding down the MENU button, wait until the 7th option “Enable Wi-Fi AP” appears on the screen, then release the MENU button to select it (the message “Wi-Fi AP Enabled” should appear on the screen briefly).
2) On a smartphone/tablet/laptop/computer (any device that is able to connect to a Wi-Fi network), connect to the Envoy’s Wi-Fi network (ENVOY_xxxxxx where “xxxxxx” represents the last 6 digits of the Envoy serial number).
3) Open up any web browser application (eg. Safari, Internet Explorer, Google Chrome), type into the address bar “172.30.1.1” and press enter.
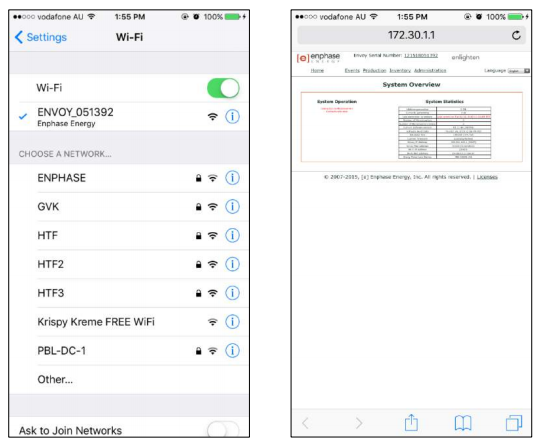
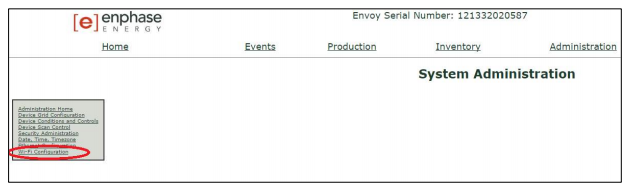
4) The Enphase Envoy page should appear; click on the Administration tab.

5) When prompted for a login, the username is "admin" and the password is also "admin" (not including the quotation marks).
6) A grey menu should appear on the left; click on "Wi-Fi Configuration".
7) Check the “Current WiFi Settings” box – if there is a network listed there you will first need to click “Forget Network”. Then click on your internet network in the list of networks that appears and enter the password (leaving all the other settings at the default settings).


8) Click "Test Connection" and once this is complete, click "Join Network".
a) If you get the test connection failed message, click the clear form button.
b) Manually type in the “Wireless Network Name” and password.
c) Change the "Wireless Security Mode" setting to "WPA Personal" and the "WPA Algorithm" setting to "TKIP" and repeat step 8.
d) If the above does not work, change the “Wireless Security Mode” to "WPA Personal" and change “WOA Akgorithm” to "TKIP + CCMP" and repeat step 8.
9) Wait up to 10 minutes and check that +Web and a new IP address appears on the screen of your Envoy.
Method B for Envoy R – Manual Configuration for Internet Connection
NOTE – An internet connection on your laptop/computer is not required
1) Ensure the Wi-Fi adapter is inserted into a USB port on the Envoy.
2) Connect a laptop/computer to the Envoy using an ethernet cable.
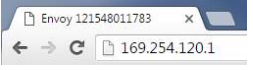
3) Open a web browser (eg. Google Chrome, Mozilla Firefox, Internet Explorer) and type the address "169.254.120.1" into the address bar (you should see this IP address on the display of your Envoy).

4) Go to step 4 in “Method A for Envoy R – Manual Configuration for Internet Connection”.
Method C for Envoy S – Manual Configuration for Internet Connection
1) Press the top button on the Envoy S (underneath the phone icon, above the lightning bolt icon).
2) On a smartphone/laptop/computer, connect to the Envoy’s Wi-Fi network (ENVOY_xxxxxx where “xxxxxx” represents the last 6 digits of the Envoy serial number).

3) Open up any web browser application, type into the address bar “172.30.1.1” and press enter.
4) Once the Enphase Envoy page appears, click on "Wi-Fi".
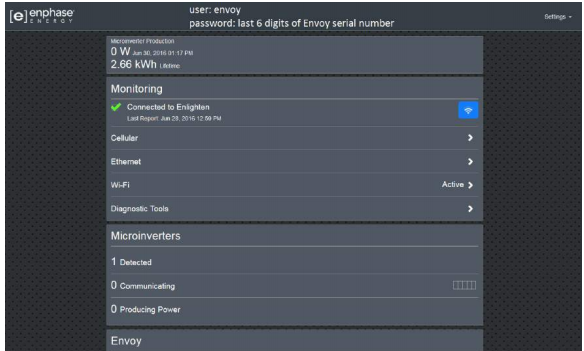
5) When prompted for login details, the username is “envoy” in lowercase letters, and the password is the last 6 digits of the Envoy serial number.
6) Under the heading “Wi-Fi Network” if there is a network the Envoy is currently connected to, you will first need to click “More Info” and then click on “Forget this Network”. Then click on “View Networks” and in the list of networks, find the internet network you want to connect to and click on it.

7) Enter the password and click connect.
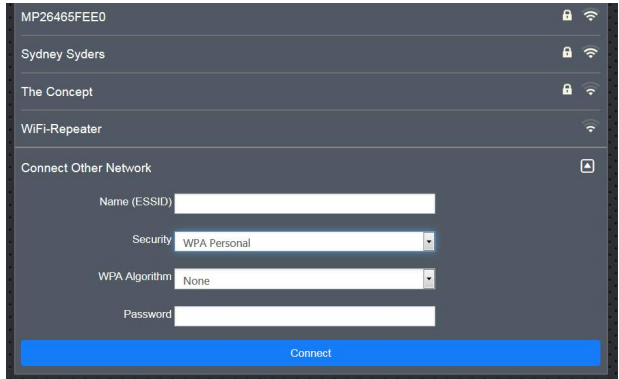
a) If successful go to step 7. If the connection is unsuccessful, click on “Connect Other Network” which should appear at the end of the list of available Wi-Fi networks.
b) Enter the network name into “Name (ESSID)” and network password manually.
c) For the “Security” setting, select “WPA Personal”.
d) For the “WPA Algorithm” setting select “TKIP” (this setting appears after you have selected a security setting).
e) Click “Connect”. If the test is unsuccessful again, repeat steps A to C but change the “WPA Algorithm” to “TKIP + CCMP” and click “Connect”.
8) After a few minutes the connection should become active; click on the blue arrow button at the top next to the title "Wi-Fi Configuration" to go back to the previous screen.
9) Click the button "Open Connection" which is located at the bottom under Connection to Enphase Support (this simply pushes through the internet connection status to Enlighten).
Method D for Envoy S – Manual Configuration for Internet Connection
1) Connect a laptop to the Envoy using an ethernet cable.
2) Open a web browser (eg. Google Chrome, Mozilla Firefox, Internet Explorer) and type the address "169.254.120.1" into the address bar (you should see this IP address on the display of your Envoy).
3) Go to step 4 in “Method C for Envoy S – Manual Configuration for Internet Connection”